最佳實務
PyCharm Remote Development
Warning: If you run the training program directly in PyCharm or in a terminal, be sure to start a daemon process using screen or tmux after debugging is complete (see the documentation: Daemon Process) to ensure the program’s execution is not affected by an interrupted SSH connection!
Remote Project Development
Official documentation: Click here
How to use WebCal:
Step 1: Verify whether you have installed the Community Edition or Professional Edition of PyCharm; only the Professional Edition supports remote development features.
Step 2: Power on the instance
Copy the SSH command for your instance, for example: ssh -p 38076 root@region-1.webcal.com
In the
ssh -p 38076 root@region-1.webcal.comcommand, the meanings of the various parameters are as follows:Username: root
HOST: region-1.webcal.com
Port number: 38076
Step 3: Configure PyCharm
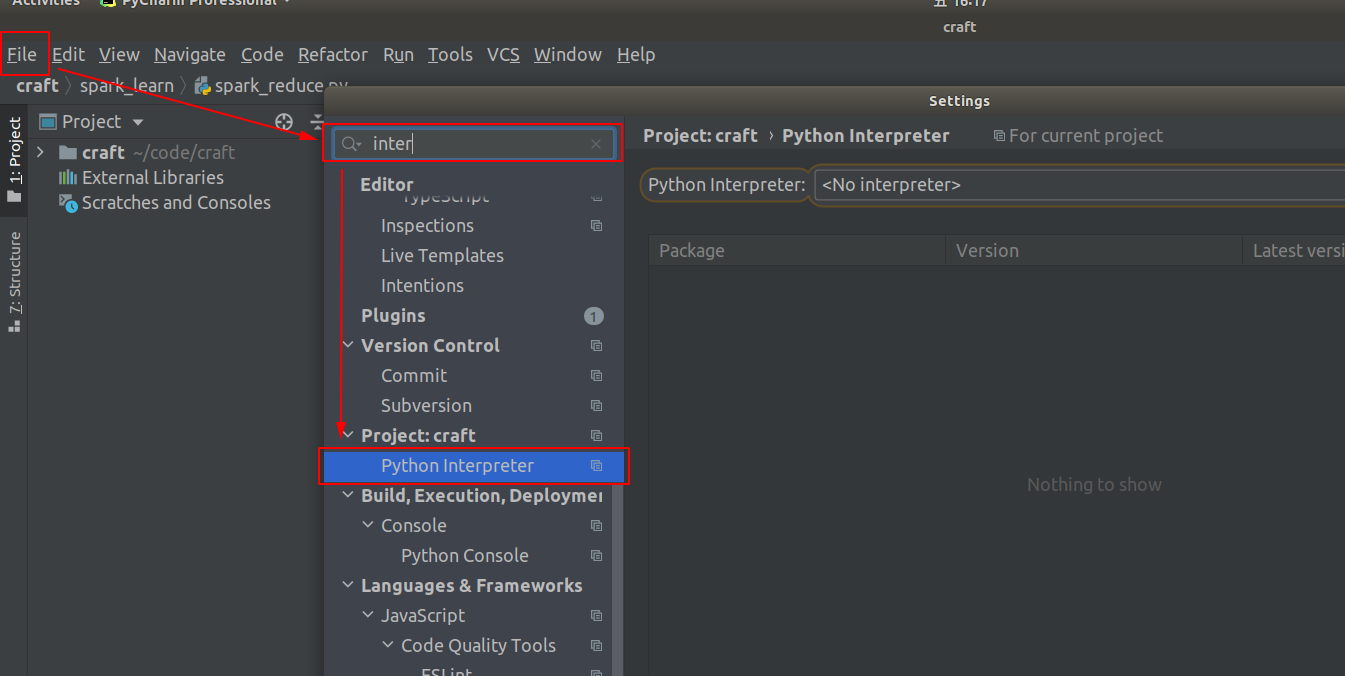
[File] -> [Settings]; open the settings dialog, search for "interpreter," and locate the [Python interpreter] setting
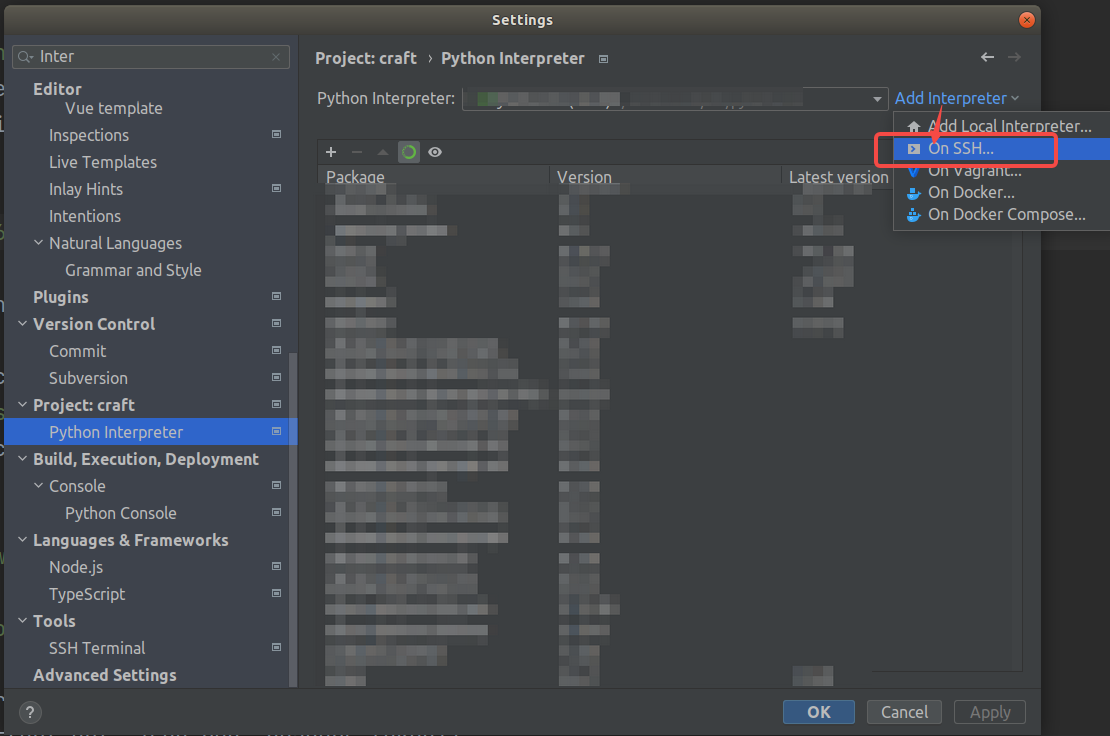
Click "Add Interpreter," select "On SSH," and click (this option is not available in the PyCharm Community Edition)
Match and enter the Host, Port, and Username from your instance’s SSH instructions (the Username is always “root”; check your instance’s SSH instructions for the Host and Port).
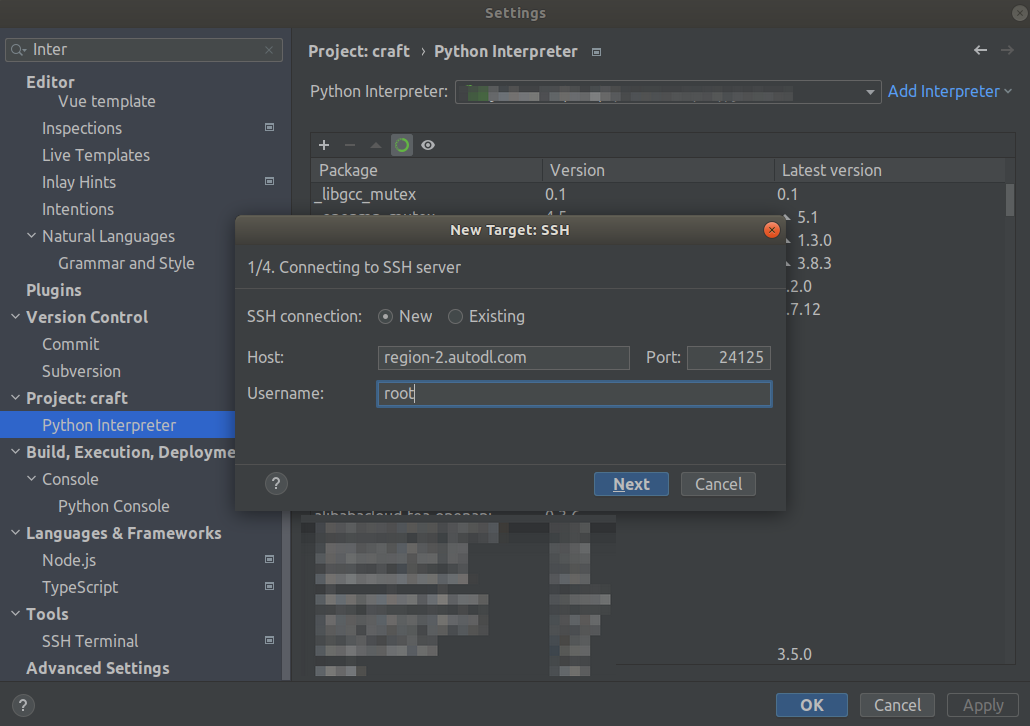
Next step: Enter your SSH password
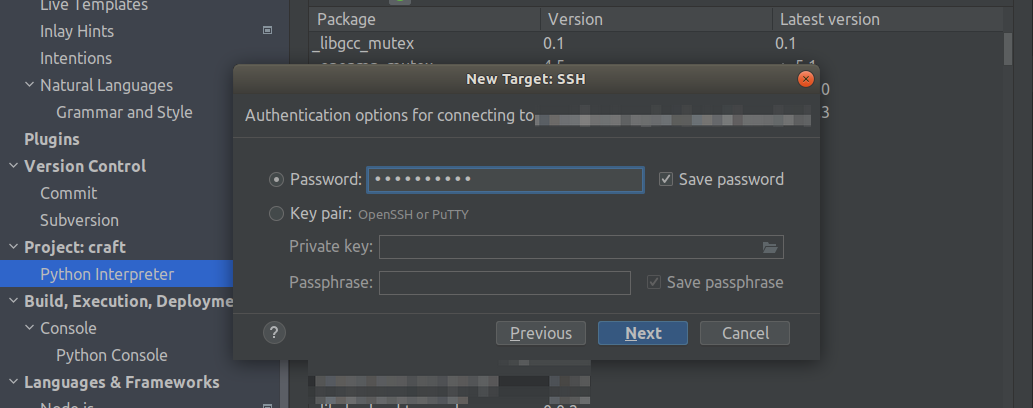
Continue to the next step until you see the pop-up window shown below. Select "System Interpreter" and configure the remote Python interpreter address to /root/miniconda3/bin/python (If you have installed other virtual environments in Miniconda, the path to the virtual environment’s Python interpreter is /root/miniconda3/envs/{corresponding virtual environment name}/bin/python).
Configure the sync directory—that is, specify which directory on your local machine should be linked to the remote instance. Set this to the instance’s data disk directory: /root/webcal-tmp/project/ (Using the default /tmp directory is not recommended.)
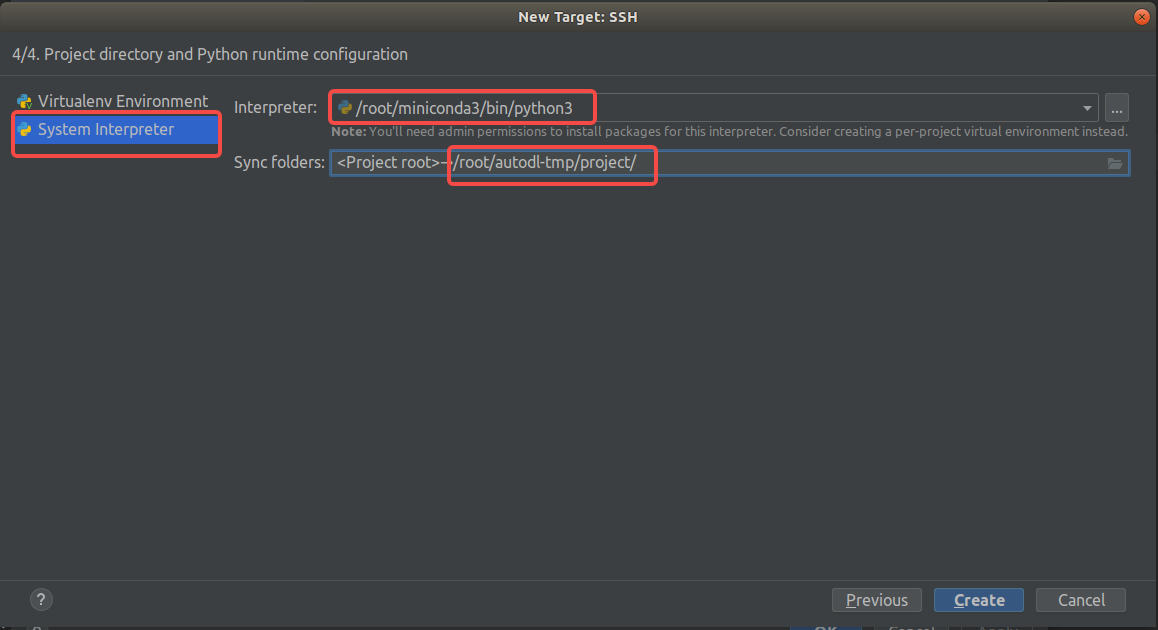
Click "Create." If all settings are correct, PyCharm will walk you through a brief configuration process. Once complete, you can begin remote development.
If you cannot find the Python files at runtime, it may be because the code was not automatically synced. In that case, you can choose to sync manually:
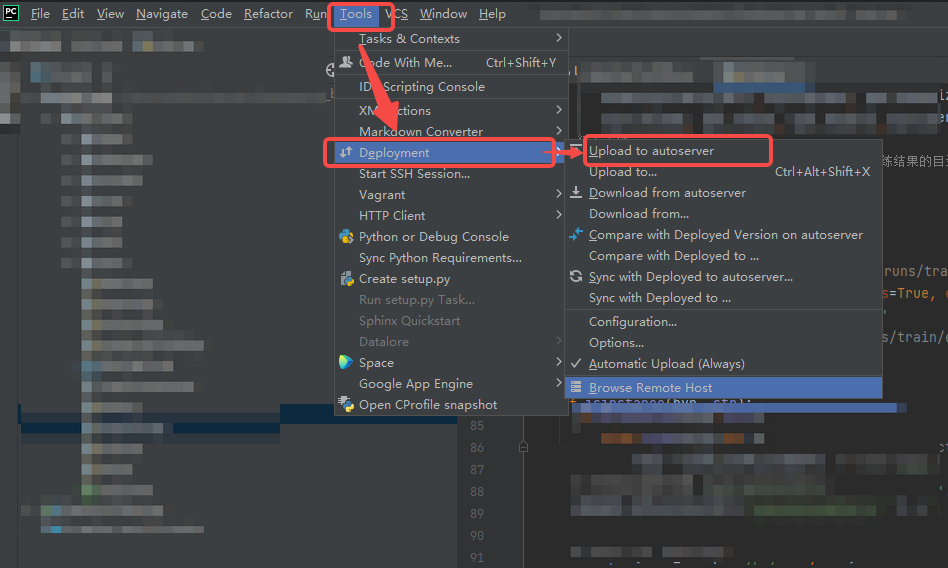
Open a Remote Terminal
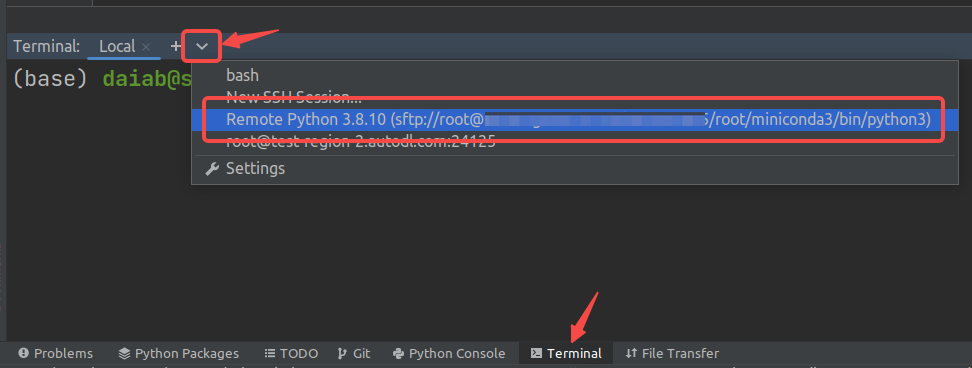
After configuring PyCharm for remote development, you can find the remote server in the PyCharm terminal and open a remote terminal: