
컨테이너 인스턴스
Remote SSH Connection
If you are a Windows user, you can log in using the system’s built-in PowerShell or Command Prompt. For a better terminal experience, we recommend downloading and using Cmder, which requires no installation—simply unzip and run. Alternatively, using XShell is even better.
If you are a Mac user, you can use the built-in Terminal to log in via SSH.
SSH Login
After starting the instance, locate the SSH login command

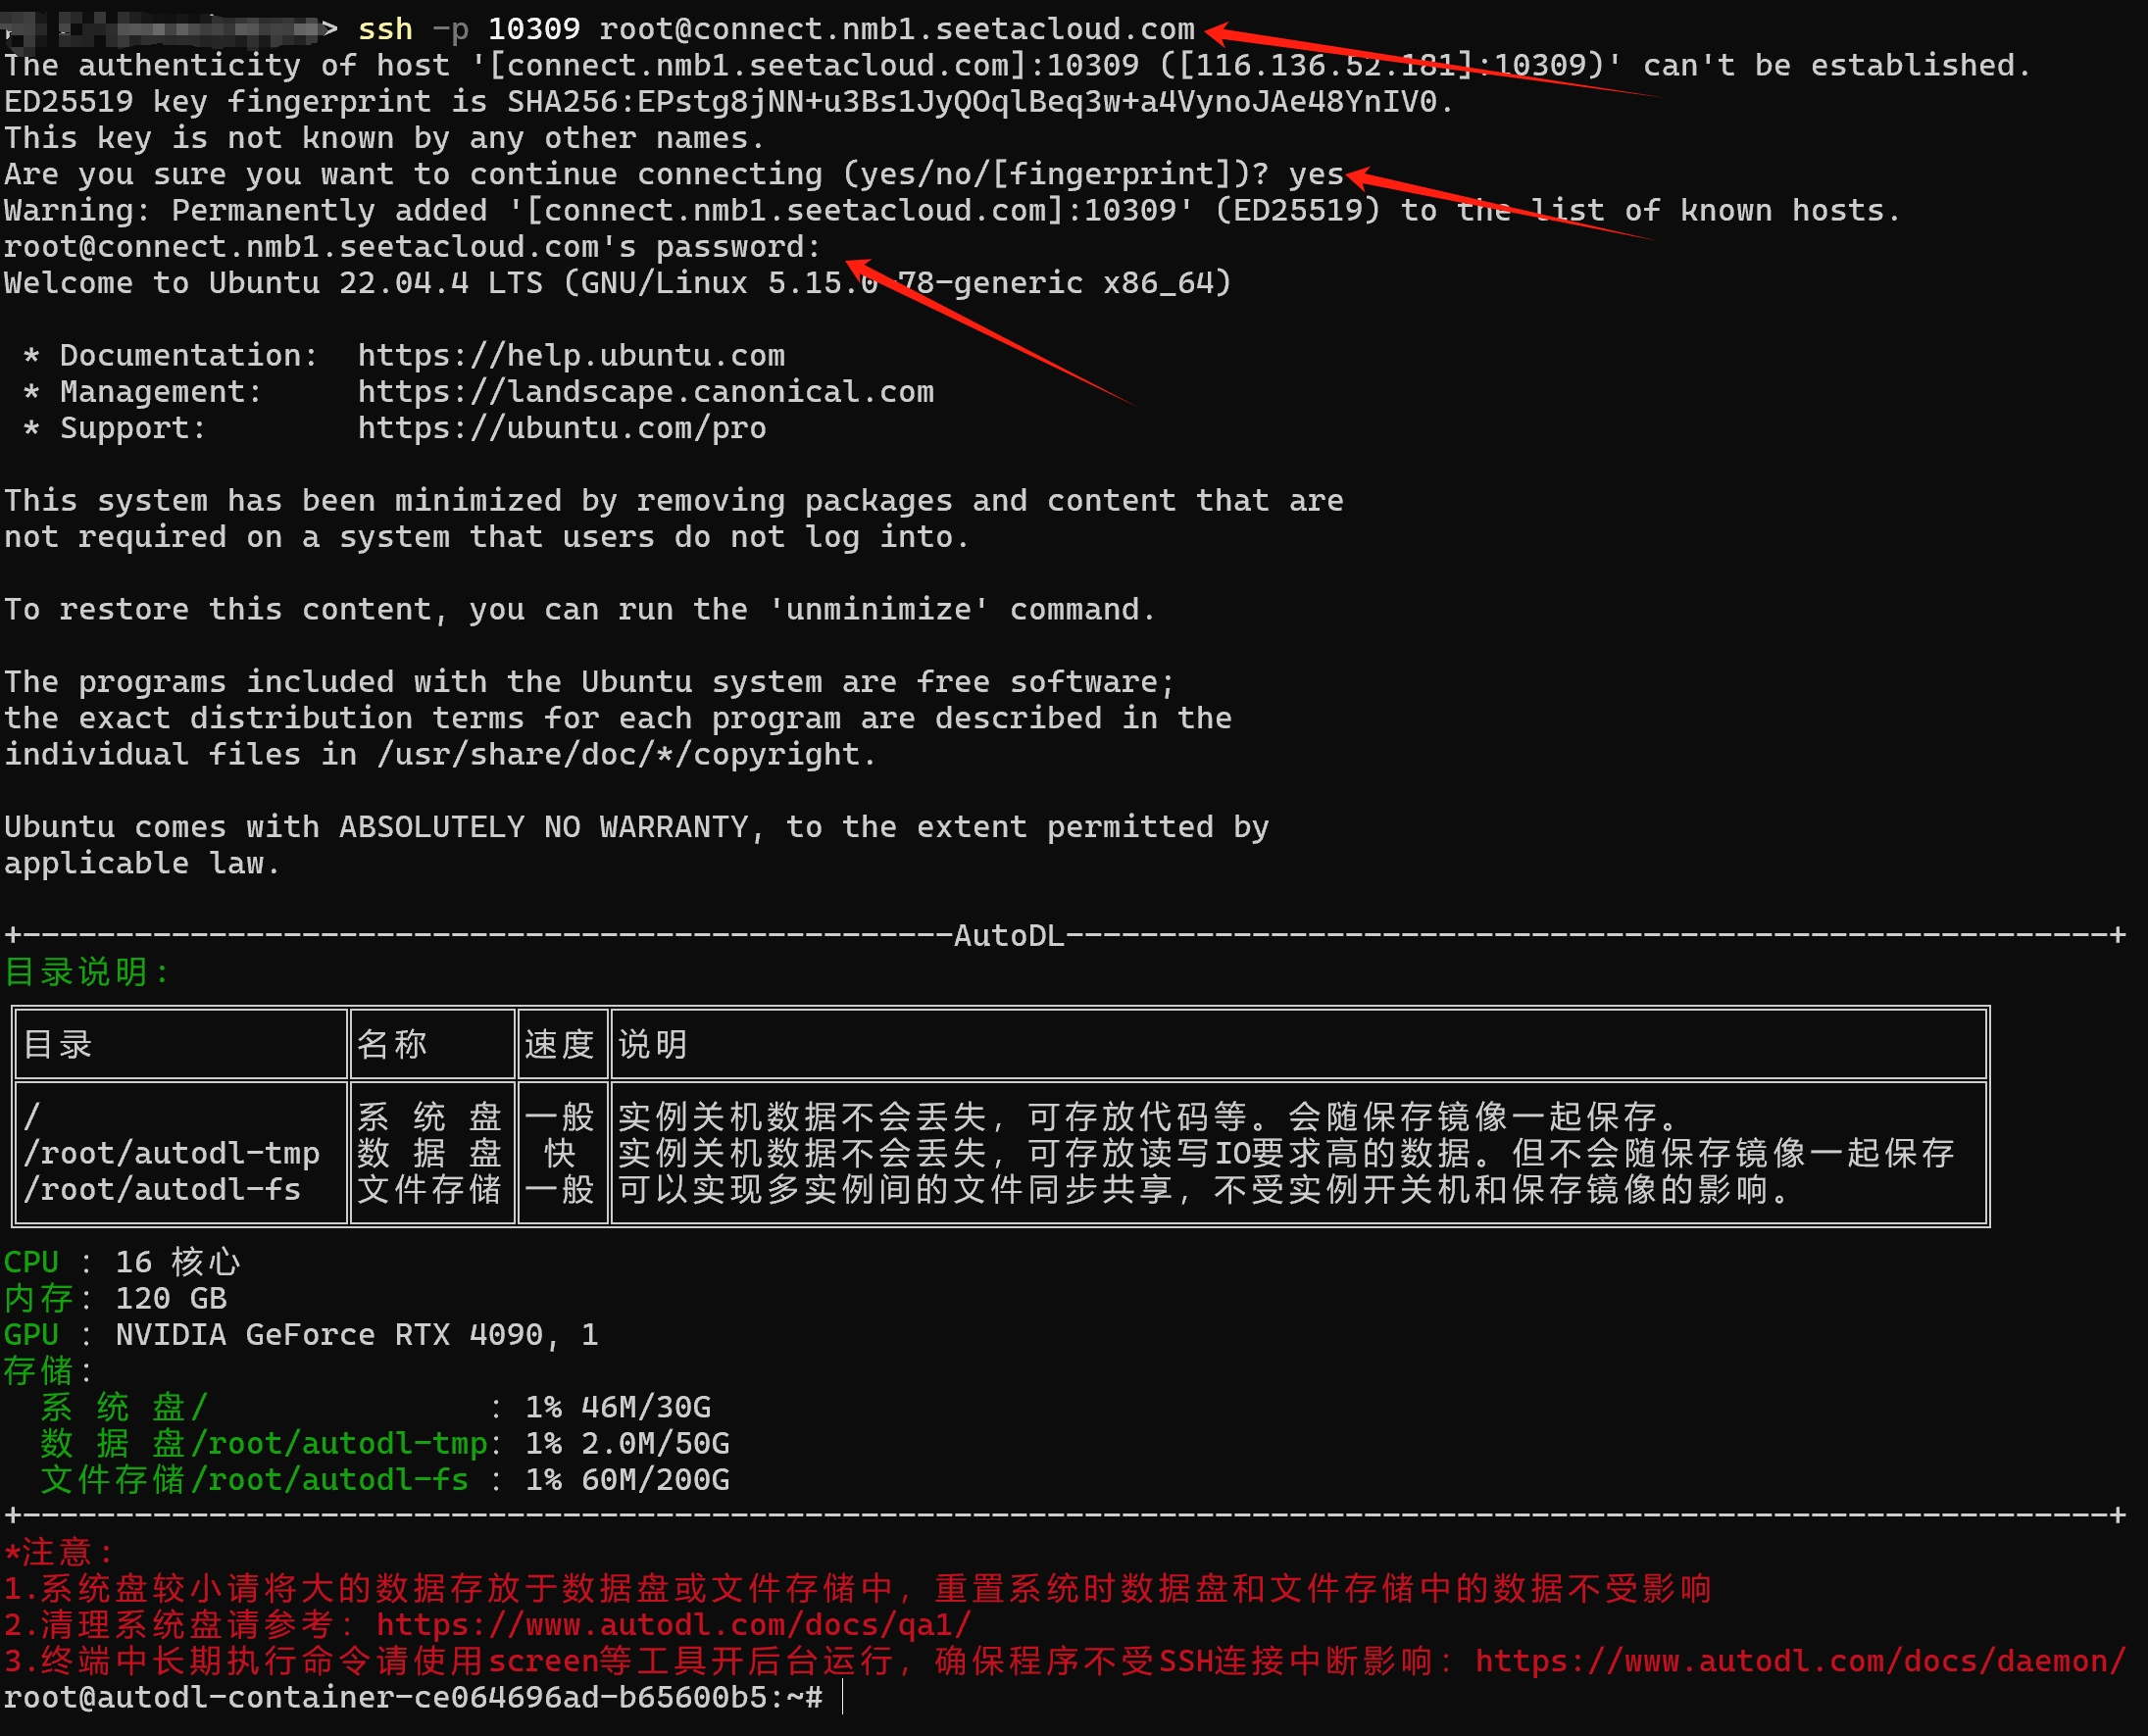
Copy your SSH login instructions; the example here uses: ssh -p 10309 root@connect.nmb1.seetacloud.com
In the
ssh -p 10309 root@connect.nmb1.seetacloud.comcommand, the meanings of the various parameters are as follows:Username: root
Host: connect.nmb1.seetacloud.com
Port number: 10309
Enter this command in your local terminal and enter your password to log in. (Note: The password will not display any characters; simply type it correctly or right-click to paste it, then press Enter.)
⚠️If you run the training program after logging in via SSH, please use
screenortmuxto start a daemon process to ensure the program’s execution is not affected by an interrupted SSH connection! For details on how to usescreen, see Daemon Processes.
Password-less SSH Login
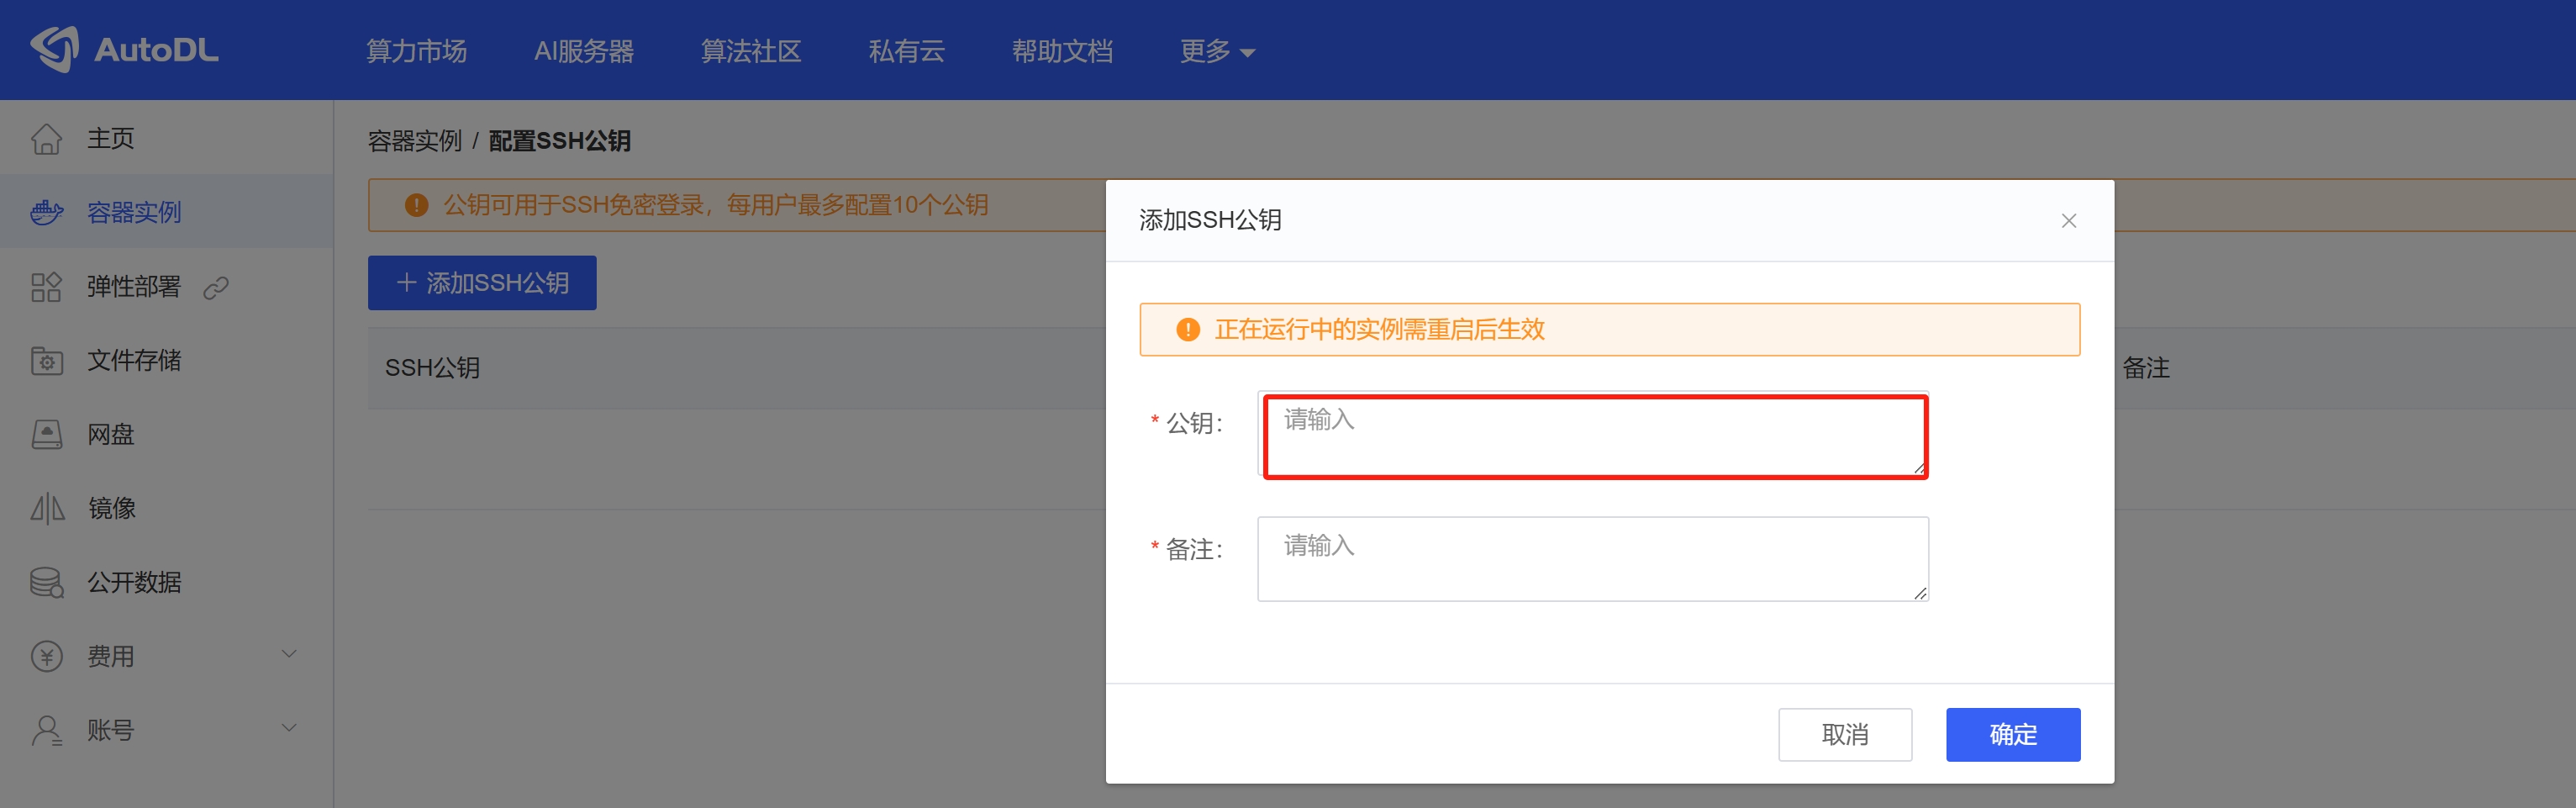
Go to Console > Container Instances > Set Up Key-Based Login to configure your SSH public key. This allows password-less login for both restarted and newly created instances, eliminating the hassle of copying SSH login passwords. See the end of this article for instructions on generating keys and public keys.

Generate an RSA key pair
For Linux/Mac users:
# 打开Terminal终端,执行命令然后回车即可:
ssh-keygen -t rsa
For Windows users:
# 打开Powershell终端,执行命令然后回车即可:
ssh-keygen -t rsa
# 老版本Win报错没有ssh-keygen命令,那么需要安装Git bash后使用Git bash终端执行上面的命令生成
Generation process:
The generated paths for Windows are at C:\Users\{用户名}\.ssh\, and for Linux/Mac at: /home/{用户名}/.ssh/

After generation, there will be two files: id_rsa and id_rsa.pub. The former is the private key (do not disclose it), and the latter is the public key. To configure password-less access, completely copy and paste the contents of the public key into the WebCal public key field.