
환경 설정
Miniconda
All images built into the platform have Miniconda installed, with the installation path set to /root/miniconda3/.
If you need to use a different version of CUDA or cuDNN, you can set up your environment in just a few simple steps using Miniconda. We recommend selecting the Miniconda image when renting an instance (it does not have any deep learning frameworks pre-installed, keeping the runtime environment clean and avoiding unnecessary issues).
The following example demonstrates how to use Conda to build the required environment, using the TensorFlow 1.15.0 version as an example.
If you need to install the virtual environment on a data disk, please refer to the method at the bottom of the documentation.
Creating a Virtual Environment
conda create -n tf python=3.7           # 构建一个虚拟环境,名为:tf
conda init bash && source /root/.bashrc # 更新bashrc中的环境变量
conda activate tf                       # 切换到创建的虚拟环境:tf
Install Software Dependencies
Here, we’ll use the installation of TensorFlow 1.15.0 as an example.
# 切换conda虚拟环境后
conda install tensorflow-gpu==1.15.0     # conda会自动解析依赖安装tensorflow 1.15.0版本需要的cuda和cudnn,无需自己独立安装

# 安装完使用Python进行简单的测试:
import tensorflow as tf
hello = tf.constant('Hello, TensorFlow!')
sess = tf.Session(config=tf.ConfigProto(log_device_placement=True))
print(sess.run(hello))
Switching Notebook Environments
How to Use a New Conda Environment in a JupyterLab Notebook
# 创建Conda新的虚拟环境(如已创建,请忽略!)
conda create -n tf python=3.7             # 构建一个虚拟环境,名为:tf
conda init bash && source /root/.bashrc   # 更新bashrc中的环境变量

# 将新的Conda虚拟环境加入jupyterlab中
conda activate tf                         # 切换到创建的虚拟环境:tf
conda install ipykernel
ipython kernel install --user --name=tf   # 设置kernel,--user表示当前用户,tf为虚拟环境名称
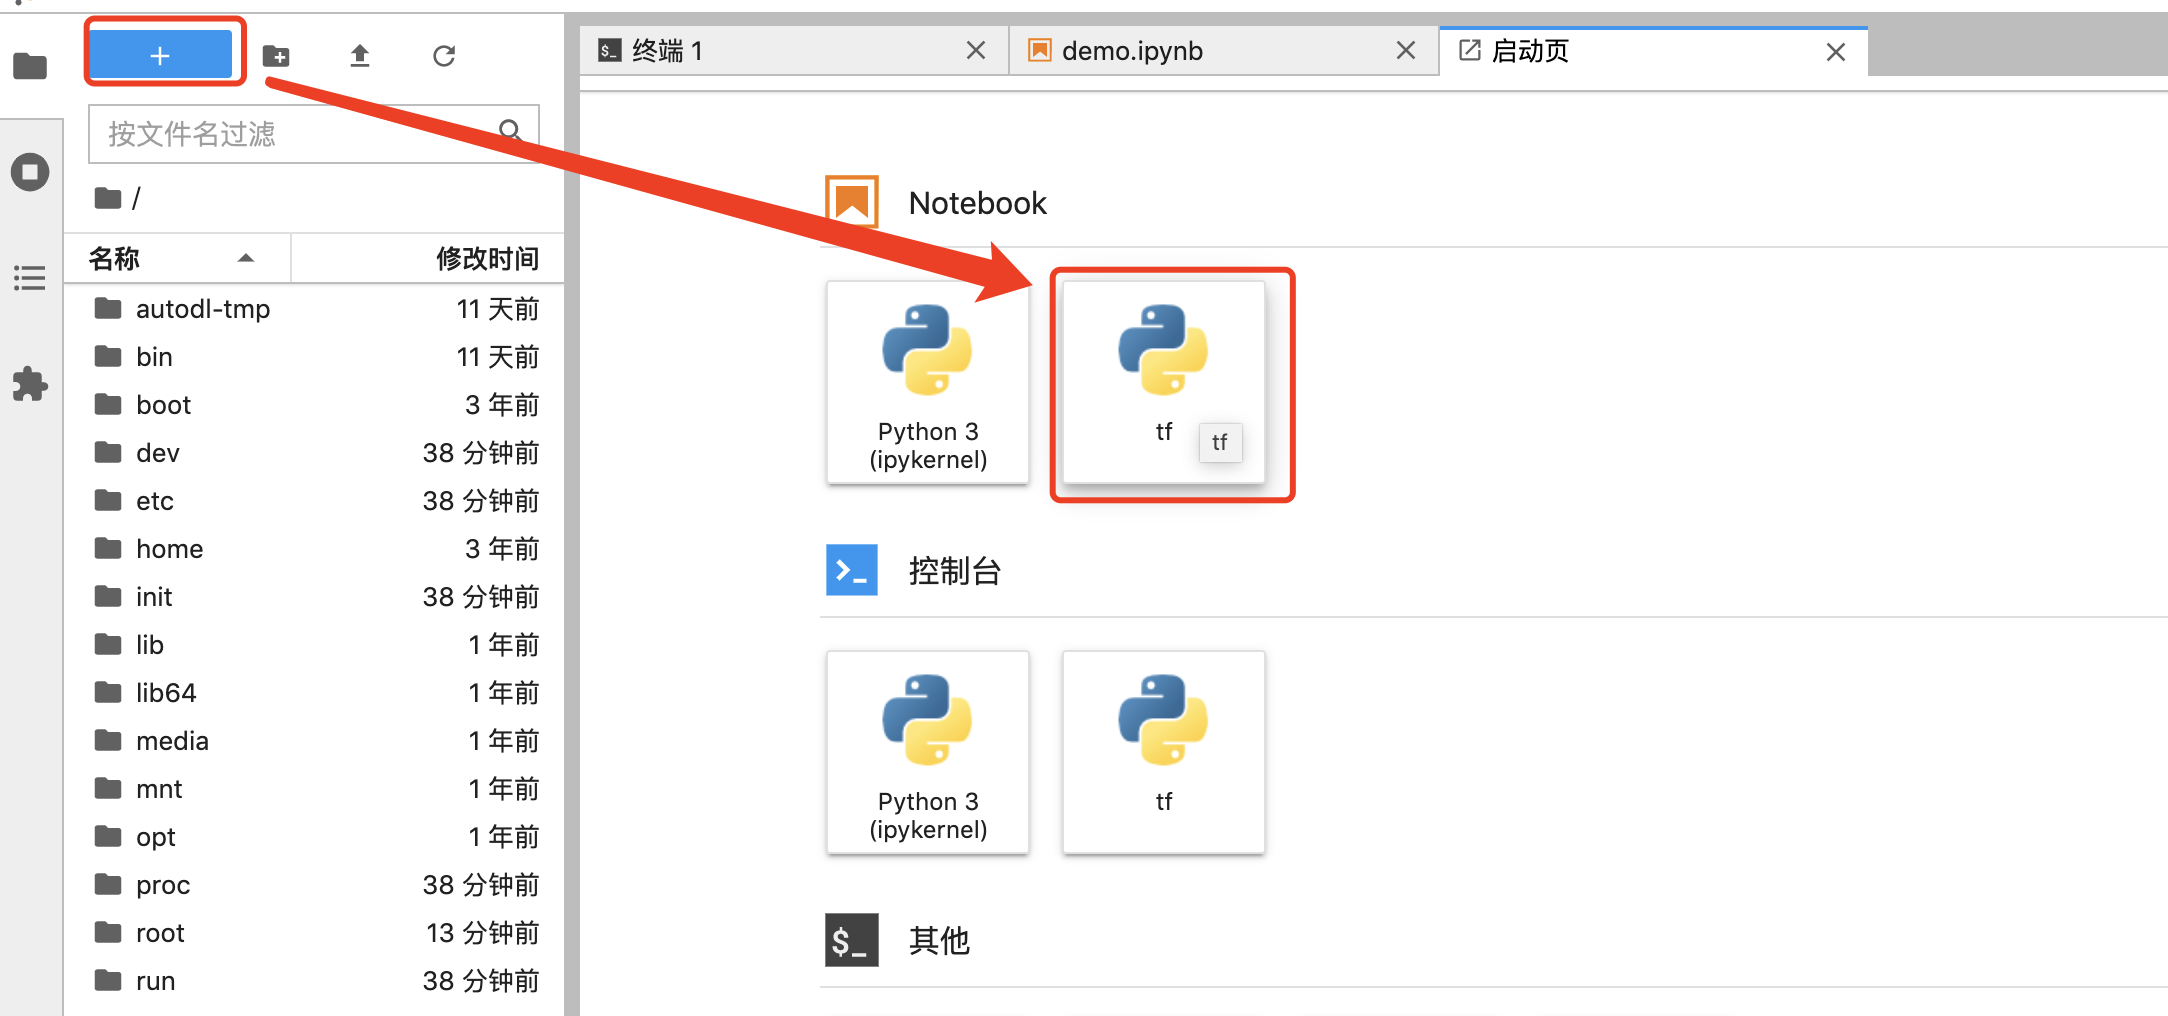
After running the above commands, if you create a new Notebook, you can select the Notebook named "tf."
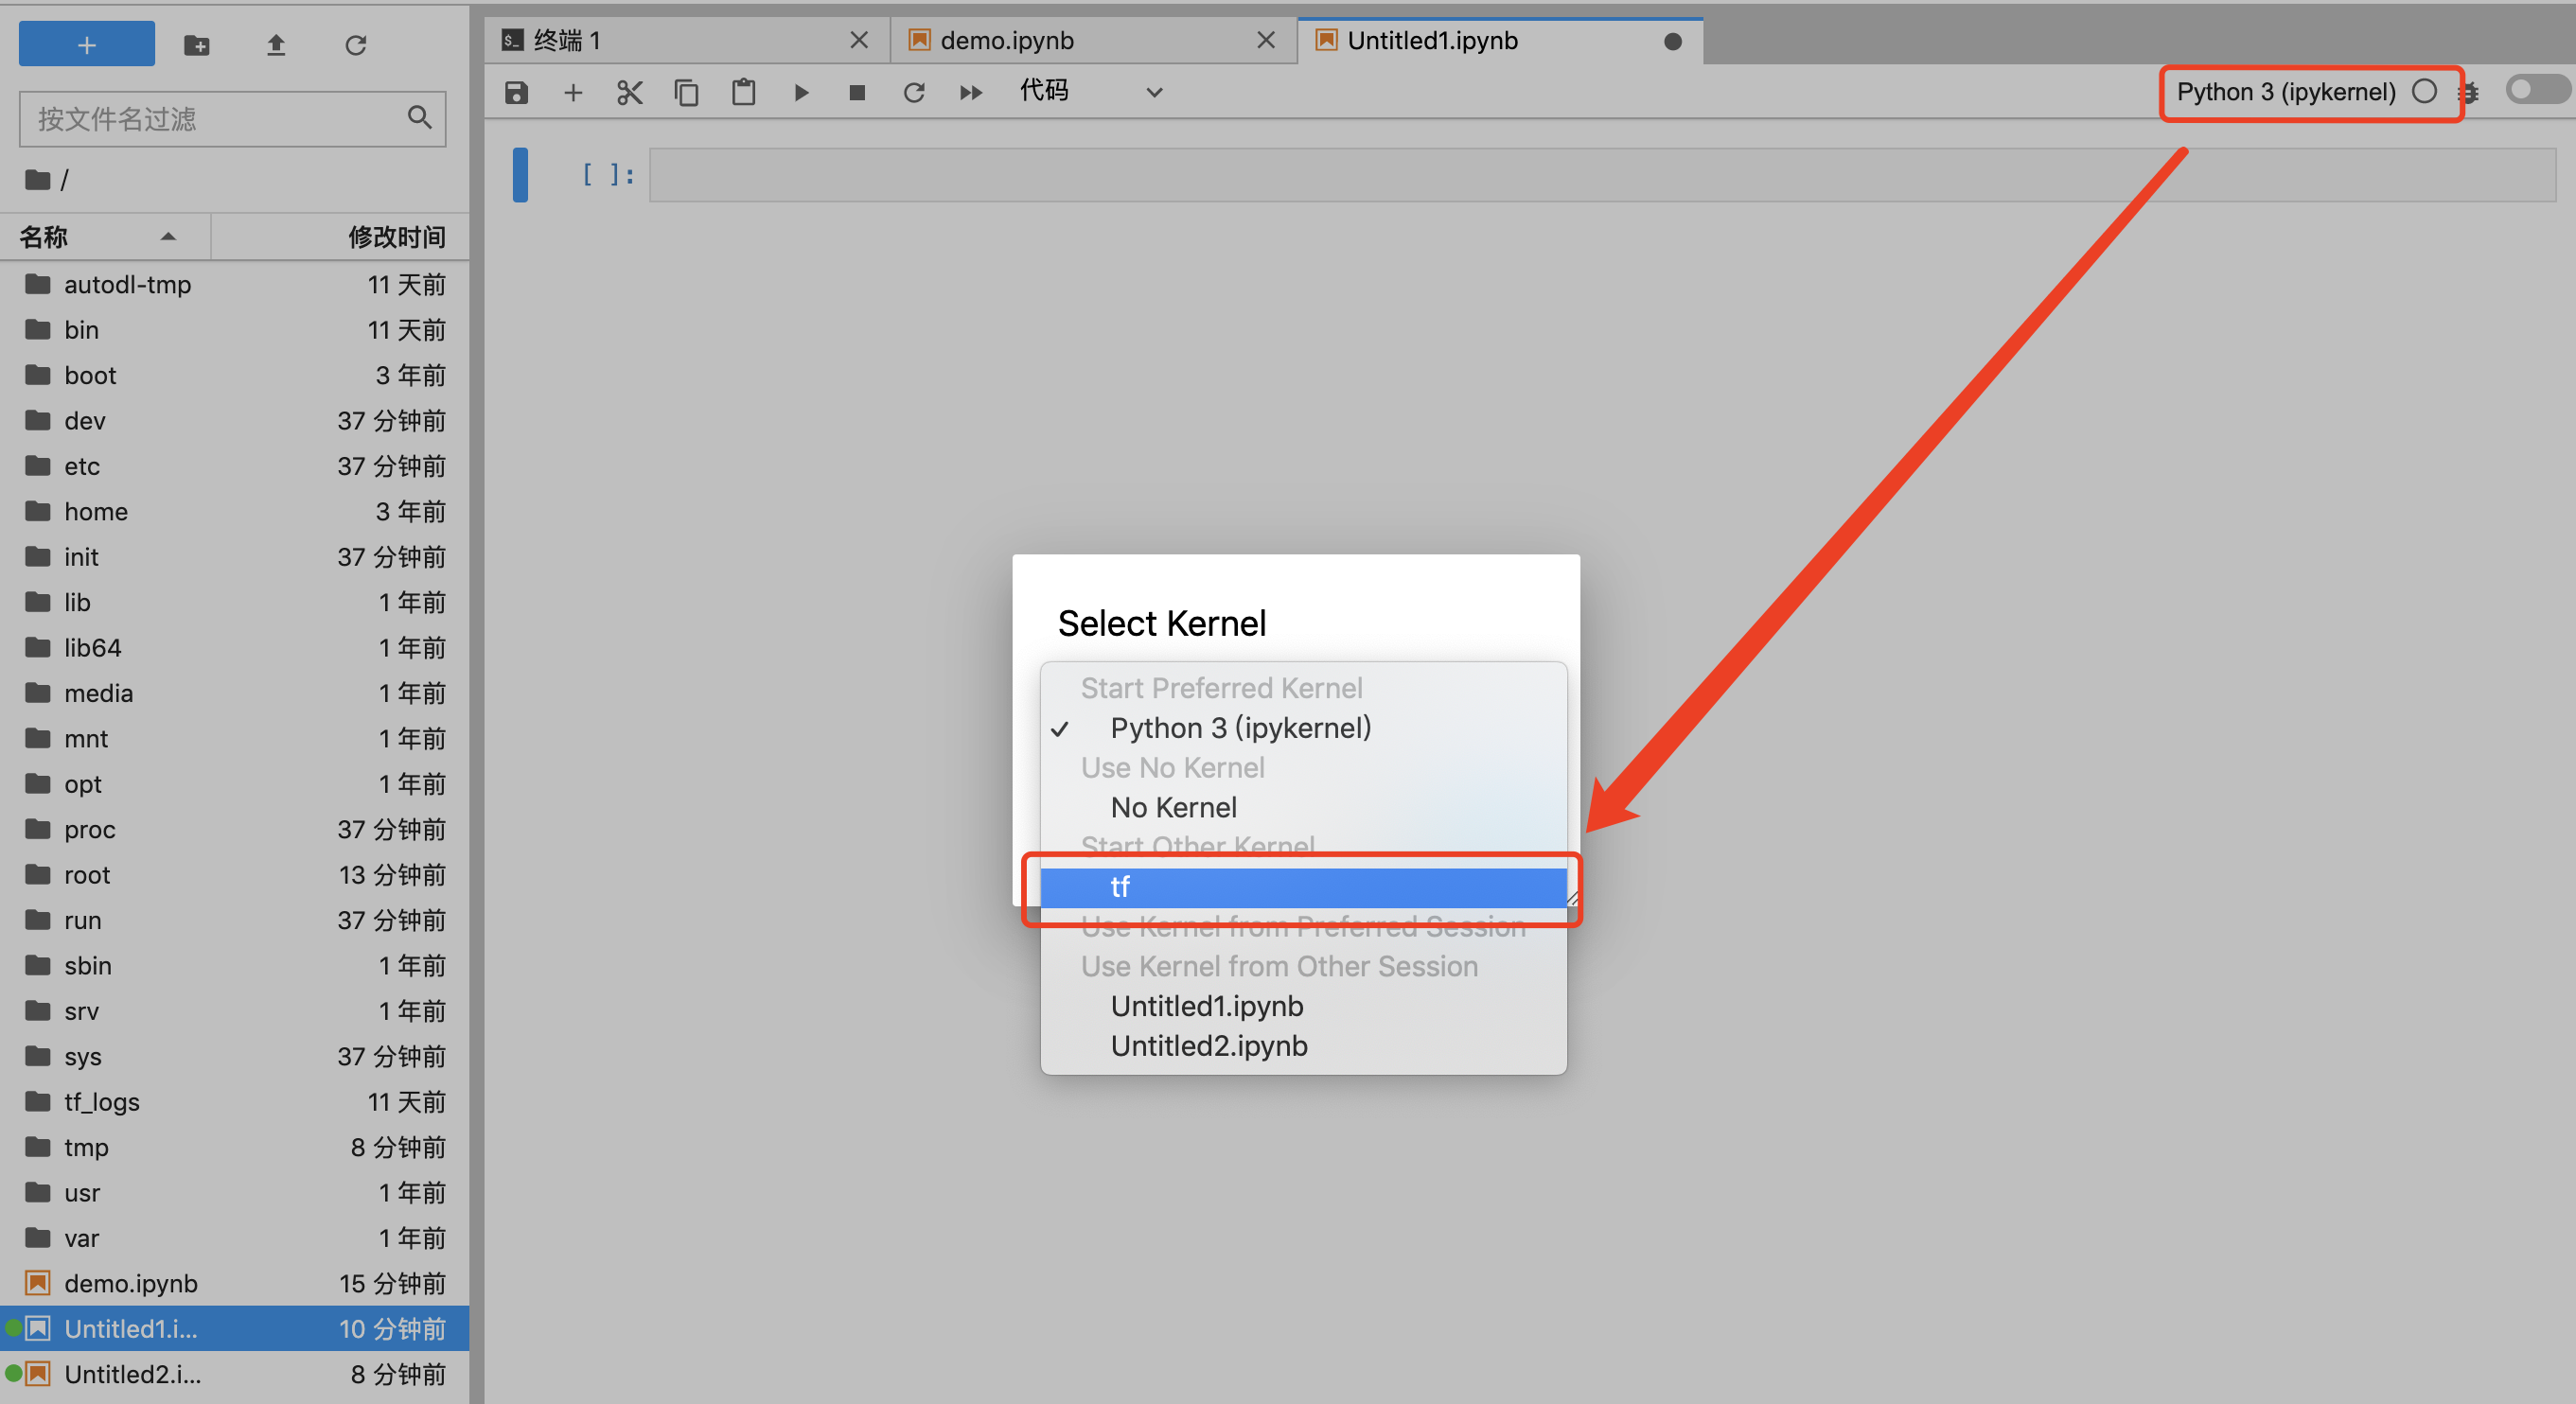
If it is an existing notebook
Clear the Conda virtual environment
# 清除安装的环境
conda deactivate          # 退出当前(tf)环境到base环境
conda remove -n tf --all  # 清除tf环境
Delete installation packages and cache
conda clean -y --all
Install the virtual environment on the data disk
Run the following command to configure the installation of the virtual environment to /root/webcal-tmp/conda/envs and the package cache to /root/webcal-tmp/conda/pkgs
mkdir -p /root/webcal-tmp/conda/pkgs
conda config --add pkgs_dirs /root/webcal-tmp/conda/pkgs

mkdir -p /root/webcal-tmp/conda/envs
conda config --add envs_dirs /root/webcal-tmp/conda/envs
Verify if it works
# 执行命令查看配置的路径是否在文件内容中
cat /root/.condarc
Disable the configuration to install the virtual environment on the data disk Edit the /root/.condarc file and simply delete the line containing the corresponding path.