
Compute Rental
Ctrl K

Guide

XShell

GuideIntegrationsFAQSupport
PricingBlog
Quick StartTop-Up and BillingAccelerating Access to Academic ResourcesQuick StartIntroductionMaintenance and TroubleshootingNetwork
PlatformJetBrain ProjectorTmpWebCal Scholars Program @2026Introduction to the Public Beta/Suqian Zone AAbout UsCopying Data Between InstancesAnalysis of Server Performance MetricsTidal Computing PowerLoad Balancing
Domestic ChipsUsing Huawei MindIEHuawei Ascend NPUMooreThread GPU
Environment SetupCUDA/cuDNNMinicondaPython3.XInstalling DependenciesOverviewImages
Enterprise FeaturesFlexible DeploymentElastic Deployment Release NotesBest Practices for Elastic DeploymentPerformance Metrics Monitoring
Container InstancesJupyterLabRemote SSH ConnectionSave the imageScaling ConfigurationMulti-machine, multi-GPU parallel processingDaemonOverviewChange the billing methodMigration Example (Same Region)Migration ExamplesRemote DesktopReset the system
Choosing a GPUGPU SelectionPerformance Testing
DataUpload DataDownload DataPublic DataPublic Cloud Storage (Highly Recommended)Compression / DecompressionFile StorageLocal data diskOverview
Best PracticesFileZillaGitGromacsHuggingFaceKataGoLinux BasicsMPIOpenCLPyCharm Remote DevelopmentR (RStudio) InstallationSSH TunnelTensorBoardRemote Development with VSCodeVisdomVulkanXShellOpen PortsWeChat MessagesPerformanceExpose multiple servicesMoney-Saving TipsComputation Precision IssuesSoftware Sources

Best Practices

XShell

07/30/202687377 views

XShell is a very useful remote management tool for Windows systems; it is powerful and convenient.

XShell Installation

XShell is paid software, but you can apply for a free license through official channels. Here’s how:

Step 1. Visit the website and enter your email address as prompted, for example:
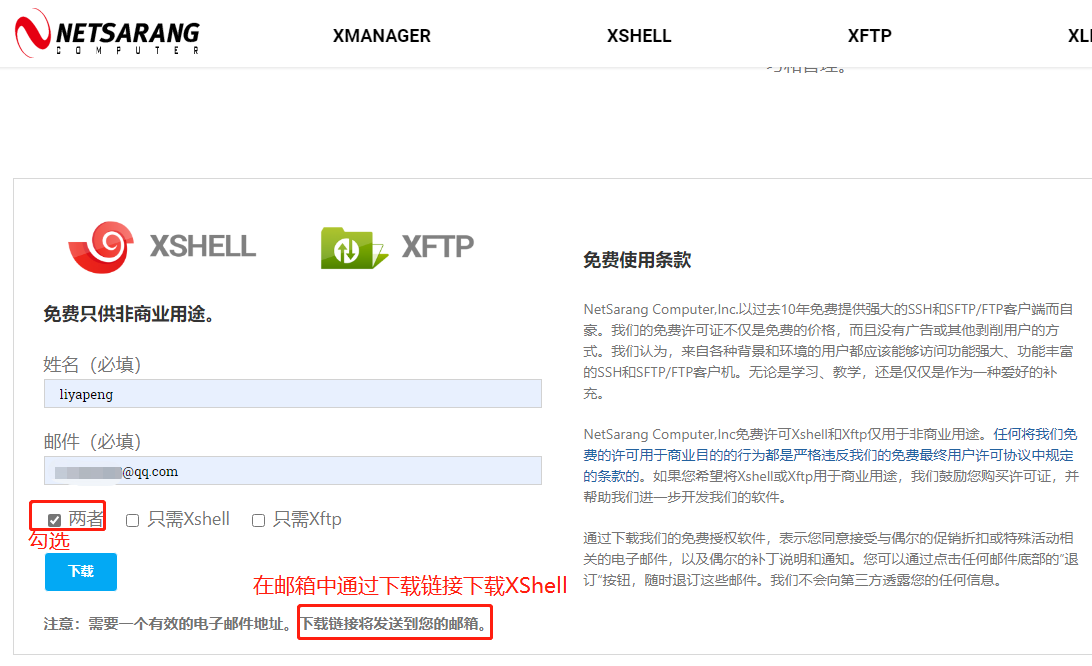
image-20210929171453401

Step 2. Use the link provided in the official email to download, install, and use the software. Note: During installation, you will be asked if you want to purchase the paid version; simply select “No.”

Using XShell

After starting the instance, locate the SSH login command

image-20210820130946320

Note: You will need to replace the port and other details in the SSH login instructions with the information corresponding to your instance.

Copy the login command (please refer to your specific instance for details): ssh -p 44562 root@region-1.webcal.com. Since the XShell command format is somewhat unusual, you’ll need to manually modify it to: ssh root@region-1.webcal.com 44562—that is, place the port number at the end and do not add the -p parameter. For example:
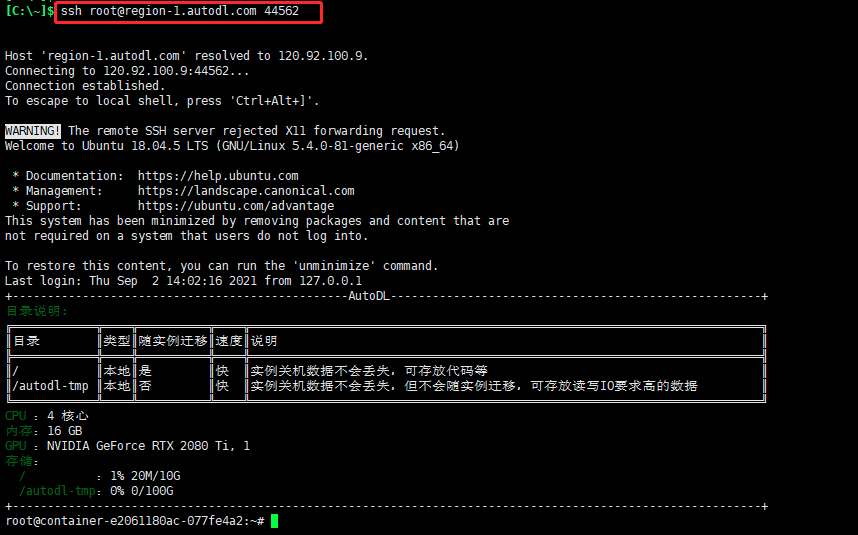
image-20210902143736972

When you type an SSH command and press Enter, a dialog box will pop up prompting you to enter your password:
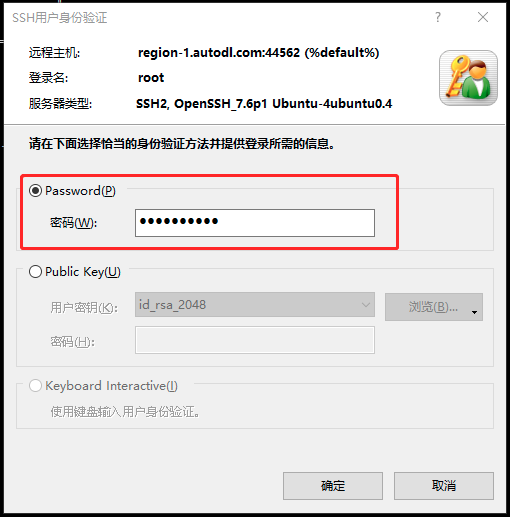
image-20210902143812721

Transferring Files with XShell

If you have already configured SSH login, you can use XShell’s xftp to transfer files as follows:
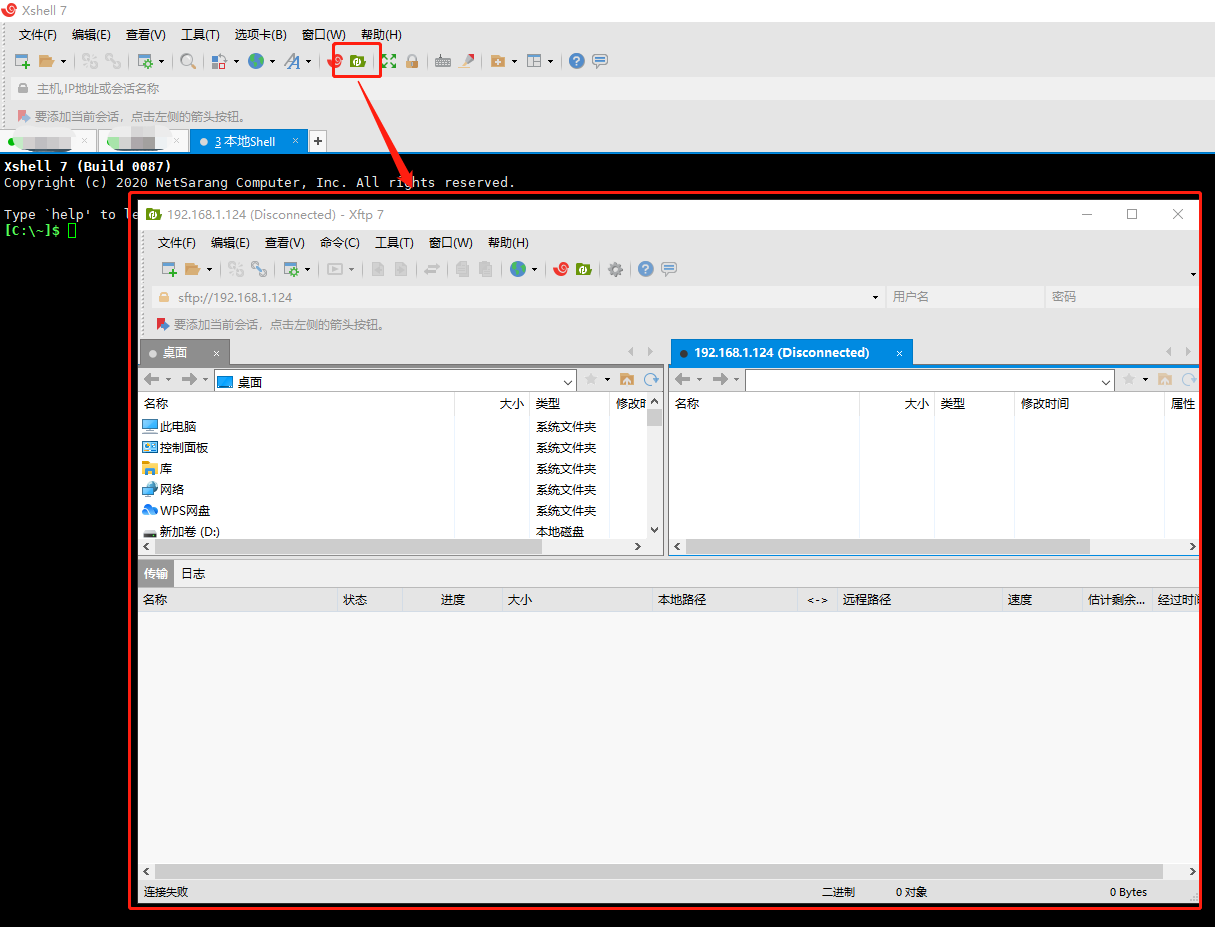
image-20211221152907016

Next articleOpen Ports
Compute Rental DocsBack to Guide